


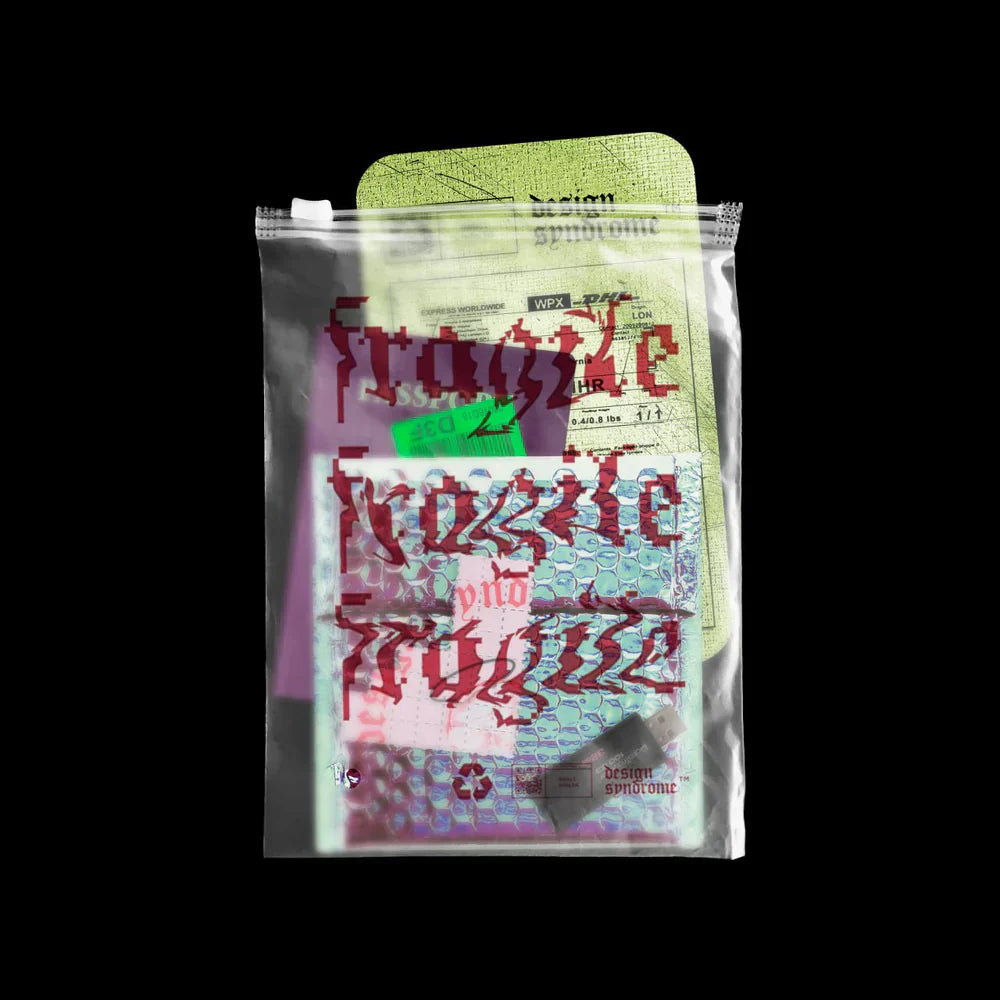
Translucent plastic doesn't "show": it suggests. Between the nervous gleam of polyethylene and the modesty of a milky veil, everything plays out in the luminous thickness. This guide gives you a studio method—fast, reliable, repeatable—to get a realistic render of a translucent plastic bag mockup. You'll find the lighting logic, ink management under the material, living folds, and breathing blacks. And to go straight into production: an included PSD, ready to use.
Direct access: TRANSLUCENT PLASTIC BAG MOCKUP • BRAND PACK.
Why "translucent" is a special case
A translucent bag is treated neither like glass (too transparent) nor like matte (too diffuse). It combines:
-
Partial transmission: the background exists, but softened by a veil.
-
Sharp specular reflections: light catches the material in edges.
-
Micro-deformations: folds, tensions at the handles, air pockets.
Translating these three phenomena requires a strict separation of responsibilities in the file: Artwork (your visual), Film (material), Specular (reflections), Displacement (relief), Shadow (anchoring). The provided PSD applies this principle so you can adjust each lever without breaking the others.
Pro method in Photoshop: the clear line
1) Insert the artwork as "ink under film."
Open the PSD. Double-click the Artwork Smart Object, place your RGB logo/poster, save. In the scene, the artwork is encapsulated in a group with an ink matte and material interactions: a light duplicate in Multiply (10–20%) densifies the print, while an exclusion mask under the highlight maps lets reflections "win" locally—exactly what happens in a photo.
2) Adjust for credible translucency (not transparency).
The Film layer controls the opacity of the material. Aim for 70–85% depending on the background strength. At 100%, the material "plasticizes" too much; at 60%, you enter the illusion of glass. A thin, cold Tint (+2 to +4 blue/green) unifies the whole and avoids a "cardboard" white.
3) Bring folds to life: displacement map + local warp.
Activate Displacement. Folds actually deform the graphics: typography curves near the handles, solid colors "break" at a crease. A very slight Warp on attachment areas creates credible tension. Resist the temptation to over-deform: realism lies in the barely-there.
4) Light as in a studio.
The Specular folder contains two families of reflections: Soft (studio dome) and Sharp (neon/display). Align the hot spot at 30–45° laterally; translucent material prefers three-quarter lighting. A lightly textured background catches the material better than a pure flat color.
5) Ground the object in the image.
The Shadow group stacks a main shadow (Multiply) and a penumbra (Soft Light). Slightly increase the Gaussian blur of the penumbra for natural anchoring, especially if you're simulating a "tabletop" shot.
The three errors that ruin the render (and how to avoid them)
Ink floating above the plastic.
If your logo looks "stuck," lower the opacity of the Multiply duplicate, and raise the reflection mask so that the shine eats into very dense areas. The eye should feel the film above the ink, not the other way around.
Reflections that are too clean.
Add 1% noise to the material group. This ultra-fine grain breaks the digital smoothness and recomposes a plausible skin, especially in large formats.
An over-saturated background.
Translucent material loves temperate ambiances. If you need to keep a vibrant color, raise the white matte under the artwork (10–15%) so that the background doesn't infuse your simulated ink.
Colorimetry without unpleasant surprises (web & print)
Stay in RGB to build and export your web visuals. Recommended dimensions: 3000–4000 px high for e-commerce hero shots, 2000–2500 px for effective product pages (export WebP for file size, PNG if you need alpha around the bag).
For print, duplicate the file, flatten critical blends, and convert to CMYK. Use a simple ink black (K 95–100) for text; avoid rich black layered under material, which overloads without benefit.
Ready-to-deploy ambiance variants
The PSD includes two film textures: Smooth (luxury packshot) and Crumpled (retail, street).
-
Studio version: Smooth + Soft Highlights, reduced penumbra, neutral background.
-
Display version: Crumpled + Sharp Highlights, slight rotation via Puppet Warp (hand-held effect), Surface Dust at 5–8% (never more).
The provided BRAND PACK helps you systematically adapt (sizes, safety margins, grids, and lighting presets) to maintain cross-touchpoint consistency.
Quality checklist before export
-
The artwork sinks well under the harshest highlights.
-
The translucency remains stable across the entire surface (no "hole" that's too transparent).
-
The handles show slight traction (subtle warp, no chewing-gum effect).
-
The shadow separates the object from the background without blackening.
-
A touch of noise unifies the plastic's skin.
What you receive (PSD included)
A high-definition Photoshop CC 2020+ file, with named and colored layers:
-
Artwork (Smart Object) with optional ink matte and ready interactions.
-
Film (opacity & tint) with two textures (Smooth/Crumpled).
-
Specular (Soft/Sharp) alignable with drag-and-drop.
-
Displacement (folds & creases) calibrated for typography and solid colors.
-
Shadow (shadow + penumbra) independent for light/dark scenes.
-
Ambiance presets (Studio, Display) + usage guide for the BRAND PACK.
Frequently Asked Questions — 2025 version (SEO)
How do I quickly integrate my logo?
Open the Artwork Smart Object, paste, save. The system automatically applies deformation and material interactions.
Why does my render look like "hard plastic" and not "flexible"?
Slightly lower the Sharp Highlights, strengthen the penumbra, and activate the Crumpled texture. Add a minimal warp to the handles.
Which format should I prioritize for the web?
WebP for performance, PNG if you need external alpha. Keep a height between 2000 and 4000 px depending on usage.
Go into production
You can start immediately with the TRANSLUCENT PLASTIC BAG MOCKUP and lock in your visual consistency with the BRAND PACK. If you want a custom adaptation (layer naming, color presets, responsive grid for product sheets), we can deliver a "zero-friction" version ready for your HYTRAPE pipeline.
Direct access: TRANSLUCENT PLASTIC BAG MOCKUP • BRAND PACK.
A good translucent plastic bag mockup is less a "trick" than a system: material, reflections, ink, relief, shadow. Once these five voices are well-tuned, everything sounds right, and your visuals stop being mockups and become images. Open the PSD, insert your visual, adjust the light: you're already in production.
Share: